A wild automation challenge appeared!
I've had a challenge on my mind for a while now. Can I use maestro to automate playing through Pokemon Firered?
TLDR: It works, but not in the amazing way you think it would.
Insepcting UI
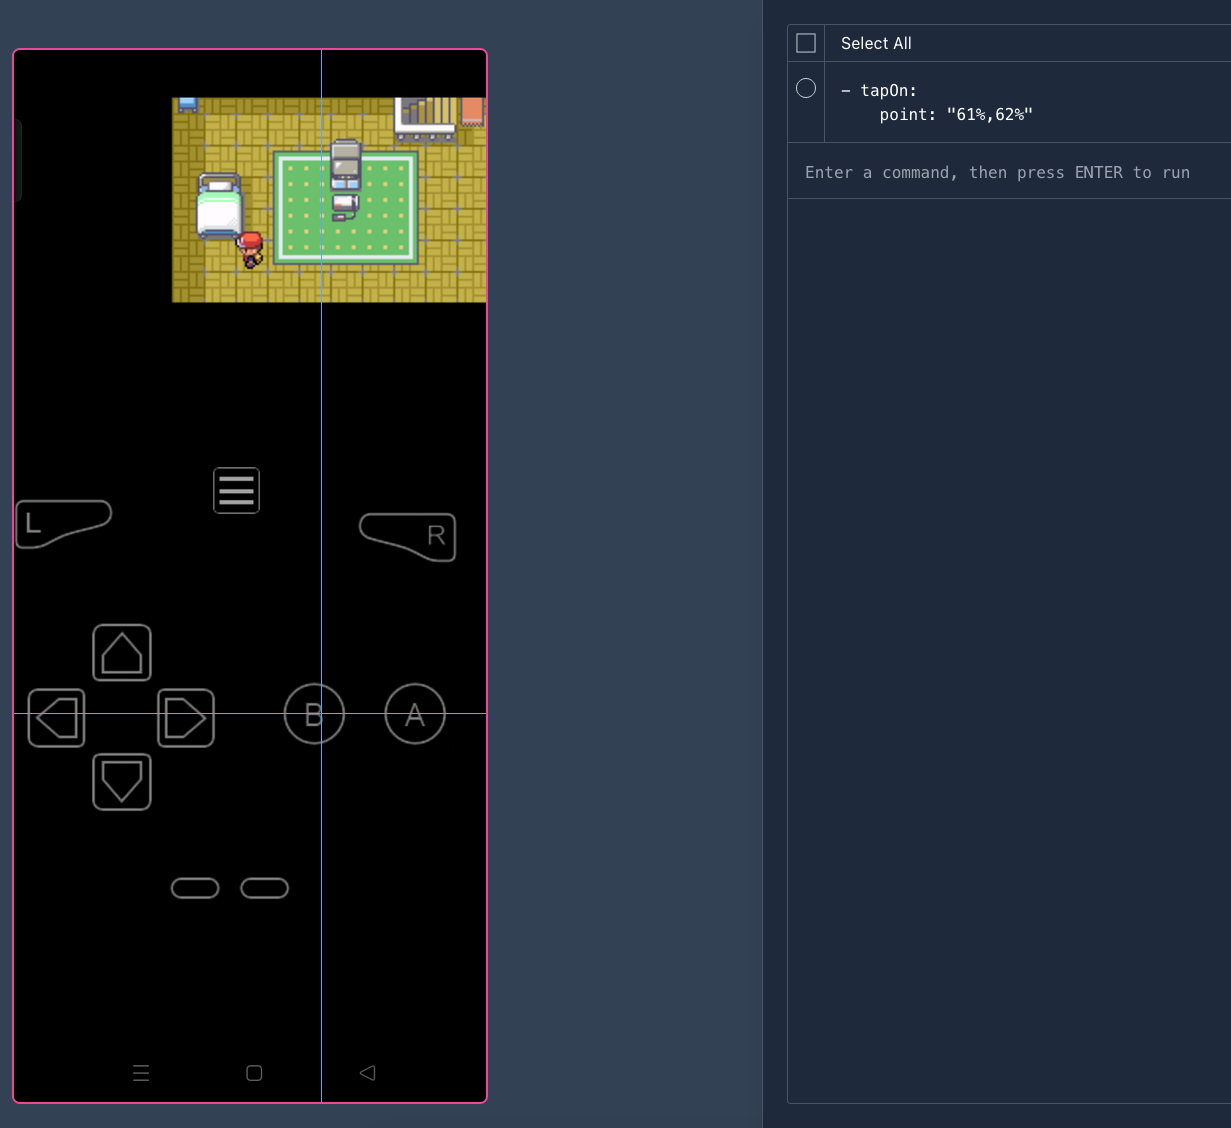
The are no UI elements to interact with in the game, and the onscreen controls don't have clear selectors to find with code. Instead, to make any sort of progress, I utilised maestro studio to explore and inspect any available app UI.
Run maestro studio from your cli to start the process on your localhost. Your default browser will automatically launch when ready.
Code
Now with none of the layout controls containing any unique attributes, I resorted to coordinates of all the required buttons. I stored all of the x,y values as button mappings in my test.
env:
  START: "53%,80%"
  A: "85%,63%"
  B: "63%,63%"
  UP: "23%,57%"
  RIGHT: "36%,64%"
  DOWN: "9%,63%"
  LEFT: "21%,69%"
To use these env variables in a flow, I could simply use ${A}, and so on. Below is all the code required for me to launch app, start game, proceed through intro screen and resume my saved game.
- launchApp
- swipe:
    direction: LEFT
    duration: 2000
- tapOn: "firered.gba"
# wait a second for gba intro
- tapOn:
    point: ${START}
# proceed past title screen
- tapOn:
    point: ${START}
- tapOn:
    point: ${START}
# wait a few seconds for transition to continue/new game screen
- tapOn:
    point: ${A}
- tapOn:
    point: ${A}
# press continue game
- tapOn:
    point: ${A}
- tapOn:
    point: ${A}
# wait for game load
- swipe:
    direction: UP
    duration: 2000
# walk around tv
- tapOn:
    point: ${LEFT}
- tapOn:
    point: ${UP}
- tapOn:
    point: ${UP}
- tapOn:
    point: ${UP}
- tapOn:
    point: ${RIGHT}
- tapOn:
    point: ${RIGHT}
- tapOn:
    point: ${DOWN}
- tapOn:
    point: ${DOWN}
- tapOn:
    point: ${DOWN}
# open start menu
- tapOn:
    point: ${START}
Yes ... almost 60 lines of code just to 'continue' my already saved game and confirm character movement. To even complete the new game setup (handling character entry and dialogue) will take me to 200 I'm sure.
Obstacles
I mean apart from everything mentioned so far, the biggest challenge is managing the dialogue and screen transitions. In maestro, I don't have an explicit wait method available, so I had to get creative. And by creative I mean, brute force.
Brute force button mashing is when a button or command is performed repeatedly, often used as a last resort to achieve a goal.
This method was successful albeit extremely painful and unreliable. Reasons being:
- transition times vary in the game
- flow files end up containing massive amounts of duplicated code
- pokemon battles, wild encounters, trainer battles are not a consistent, repeatable script to cleanly convert to code (or brute force)
Result
Below is the recording of a somewhat successful run. You'll see that at the continue/new game screen, the wait time was not enough and I flick up/down in the menu.
This up/down movement is actually scripted to be after 'continue' is pressed. Due to the loading times or button presses being unreliable, I'd have to add more A button presses to ensure 'continue' is pressed. Doing so will only add more duplicate code.
This further proves my painpoint about load times and screen transitions being the driving (or breaking) force here.

Now, although I was dissapointed upon realising the time it would take to create a script to automate the WHOLE game, I was pleased to see it was possible. And that's the main thing.
I haven't looked around too much into alternative automation solutions here, but I'm sure there'll be a time for me to give this another go.
For now, I'm happy to play.